
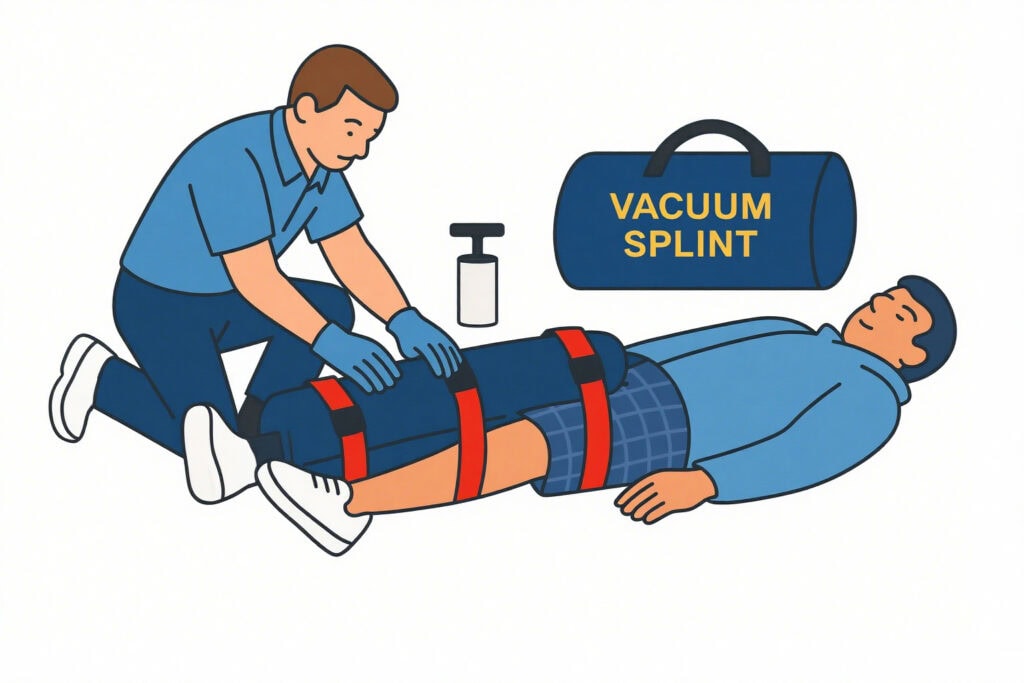
The road is slick, the car is crumpled, and the clock is loud. You kneel beside the driver and see the leg angle you never want to see. This is where the vacuum splint earns its place—it helps emergency personnel stabilize the limb fast without turning every bump into fresh pain.
If you’ve managed fractures with pressure point tenderness, you already know the difference a good splint makes for patient comfort. The right choice turns chaos into control.
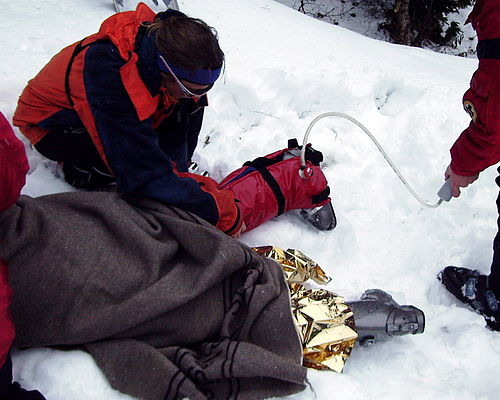
How a Vacuum Splint Works (and Why Patients Feel Better)
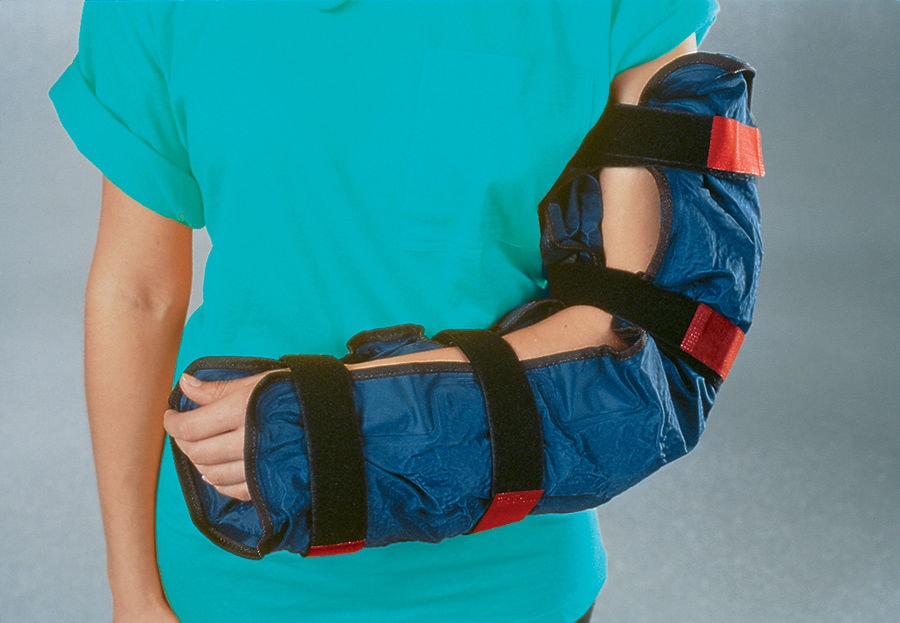
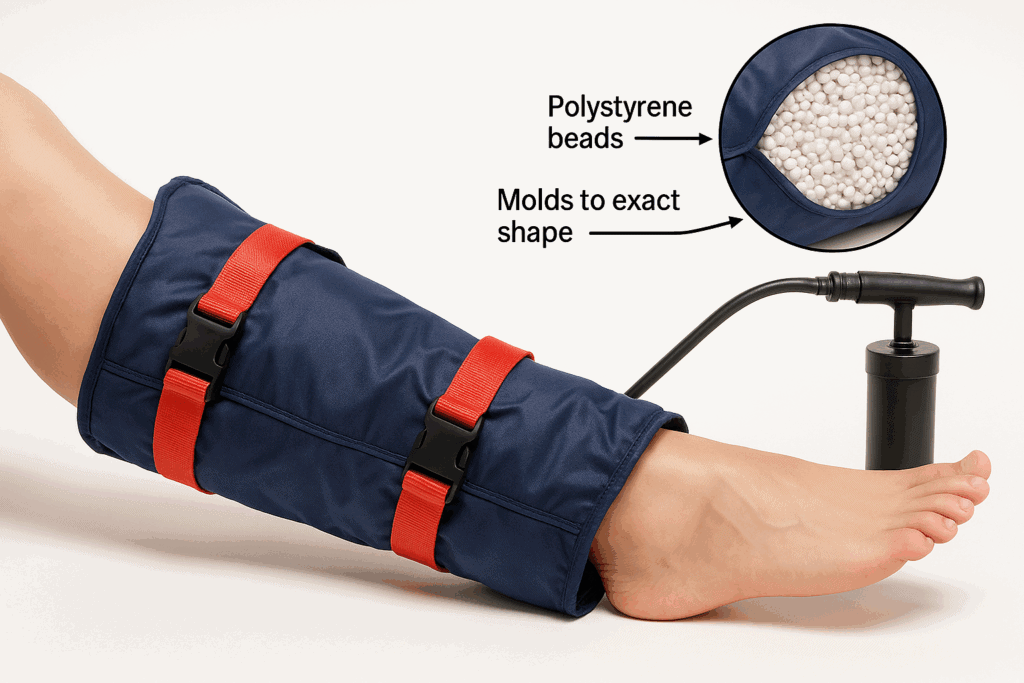
A vacuum splint is one of those patient handling devices that looks simple and works brilliantly. The shell is filled with polystyrene beads. Wrap it around the limb, attach the portable suction unit, and evacuate the air. The beads lock together and the splint molds to exact shape—literally an immobilizer tailored at the curbside.
- The result is continuous full body support (when using a full-body model) or very focused body support for one limb.
- Even circumferential pressure stabilizes the injury site but avoids hotspots that trigger pressure point pain.
- In cold ground or icy wind, polystyrene beads insulate, which can keep a shaky patient calmer.
Clinically, this approach vastly increases patient comfort and significantly reduces micro-movement.
Types & Use Cases
- Full length vacuum splint: For multi-trauma or when you need whole-body shaping before transport.
- Limb splints: Fast, light options for arms, wrists, ankles, and the patient’s legs—great for sports knee injuries and workplace accidents.
- fasplint fullbody systems: Known for integrated hip support and optional temporary cervical support during short moves.
- Pediatric sizes: Proper scale for kids with the same shaping and comfort.
Where they shine:
- Long transports where comfort matters.
- Confined spaces or stairwells where a tapered design accommodates tight angles better than rigid gear.
- Mixed-mechanism trauma when you need shape-matched control before definitive care.
Step-by-Step: Getting Reliable Immobilization
- Assess & prep: Expose the injury site, check distal CSM (circulation, sensation, movement).
- Position: Slide or cradle the splint under the limb/body. Light padding over bony points can alleviate pressure point pain.
- Shape: With hands, form the shell roughly to the exact shape needed.
- Evacuate: Use the portable suction unit until the splint is firm.
- Secure: Straps on; verify patients secured before lifting.
- Recheck: Confirm CSM; if pressure point pain appears, fine-tune the vacuum or padding.
Field tip: Don’t chase “as hard as possible.” You want rigid-enough support, not a tourniquet.
Mistakes That Cost You Time (and Comfort)
- Over-tightening: Too much circumferential pressure risks circulation.
- Under-vacuuming: A soft splint won’t immobilize; it just looks the part.
- Ignoring the surface: Mud, snow, rain—recheck strap friction and stability after the first lift.
Vacuum Splint vs. Other Options (Quick Compare)
- Rigid board: Strong but unforgiving; hotspots increase pressure point pain on long rides.
- Inflatable splint: Light and cheap, but fit is variable and prone to leaks.
- Vacuum splint: Custom fit (exact shape), reusable, and usually the best balance of stability and comfort for limbs—and with full-body models, you get whole-patient shaping.
Buying Checklist (What Pros Actually Look At)
- Coverage: Multi-trauma? Choose a full length vacuum splint; otherwise limb sets are faster.
- Design: A tapered design accommodates more body shapes and tricky carries.
- System value: For new teams, a complete budget friendly package (splint + pump + bag) saves setup time.
- Durability: Brands like Hartwell Medical are common in the field; their longevity can lower replacement cost.
- Integration: Make sure it plays well with your stretcher, straps, and various patient handling devices.
Care, Cleaning, and Service Life
- Rinse off grit before disinfecting; grit can abrade the shell over time.
- Check valves, seams, and straps after every call.
- Store flat, dry, and out of heat. Good care significantly reduces early failures—and surprise replacement cost.
A Note on Cervical Care
A vacuum splint doesn’t replace a collar, but larger systems (e.g., fasplint fullbody) can provide temporary cervical support during short, carefully monitored moves. Use your local protocol.
What We Provide
At Jiekang, our sets are built for field realities—resistant to disinfectants, compatible with various patient handling devices, and customizable in size, color, and branding. We also include training resources, because gear is only as good as the hands using it.
Learn more at Jiekang.
Bottom line: Pick the model that fits your calls, train until application is muscle memory, and you’ll have a tool that keeps pain down and control up.
Quick FAQ
Q: When would you prefer a rigid splint?
A: When protocol demands it or you need a fast, simple long-bone immobilizer with minimal setup.
Q: Do vacuum splints leak in the rain?
A: Quality shells hold fine. Just keep valves clean and covered; recheck firmness after the first carry.
Q: One limb set or full body first?
A: Most EMS teams start with limb sets; add a full-body once you’ve nailed the basics and see the need.

