

Introduction
If you’re trying to deploy rescue stretchers in emergency drills, your real enemy usually isn’t motivation—it’s variation. One team stages straps; another forgets them. One team loads smoothly; another stalls at the threshold. A stretcher drill fails when roles, checks, and handoffs aren’t standardized. Safe patient handling guidance warns that manual patient handling can drive work-related musculoskeletal disorders, and it frames prevention as a system: accessible assistive devices, clear procedures, and repeated training—so the right movement is the easy movement.
In the next sections, we’ll build a field setup sequence you can repeat, score, and improve—without turning your drill into slow paperwork.

Drill-ready deployment sequenceequipment accessible + training
Stage the Patient-Movement Lane Before the Scenario Starts
Treat stretcher deployment as its own mini capability lane: one staging spot, one kit, one owner.
Two reasons this matters:
- Injury prevention programs emphasize making safe-handling equipment accessible and backing it with training—not relying on memory under stress.
- Exercise doctrine exists so you can run repeatable, measurable practice—then fix what fails.
Minimum staging kit (adapt to your scope and stretcher type):
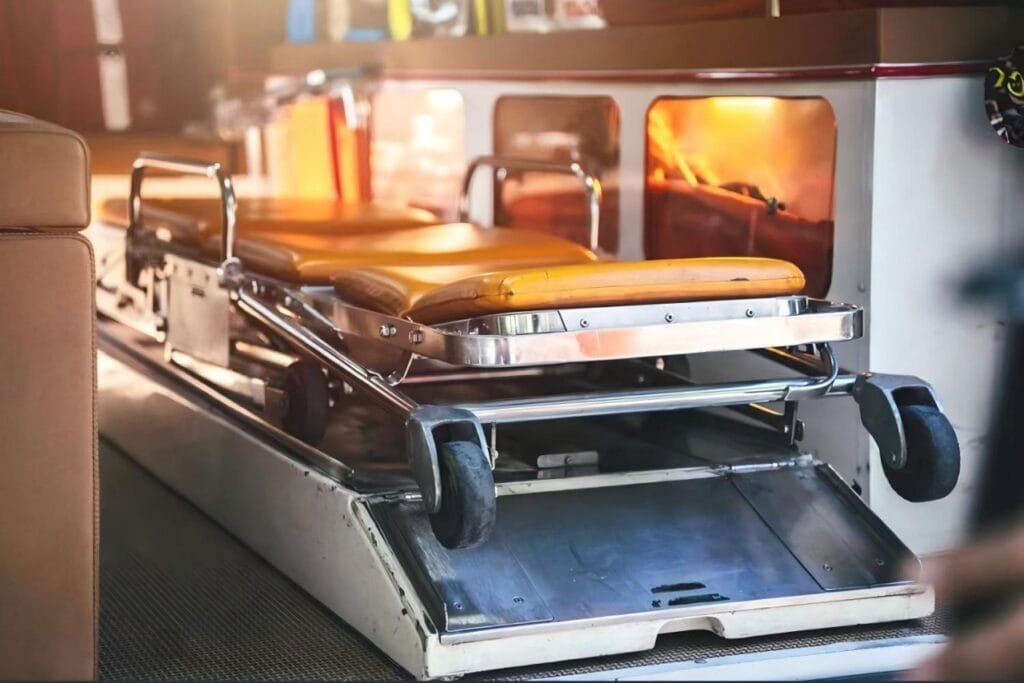
- Primary stretcher (ambulance cot, folding stretcher, rescue litter/basket)
- Restraints/straps (and head immobilization/spinal restriction equipment if used locally)
- PPE + decon kit (wipes, gloves, disposable covers if appropriate)
- Spare battery/charger if powered
- “Small spares” pouch (buckles, Velcro, pins, tag labels)
Assign roles that match real incidents
You don’t need a full Incident Command Post for a drill lane—but you do need role clarity.
Core roles to assign:
- Drill Lead / IC: defines success conditions and time box.
- Safety Officer: identifies hazards, briefs safety messages, and can stop unsafe acts.
- Stretcher Team Lead: owns the step sequence and commands.
- Head-end + Foot-end Operators: hands-on movement.
- Spotter / Route Owner: thresholds, stairs, blind corners, loading zone.
- Equipment Runner: brings missing items without breaking the lane.

Run the step-by-step field setup
Use this as your drill script. Keep it visible in staging (laminated sheet or QR code).
- Confirm zones + route (30–60 seconds)
Define patient-contact zone, packaging zone, and restock zone. Give the Safety Officer an explicit stop-work signal. - Perform a “ready check” on the stretcher (60–90 seconds)
Manufacturer manuals treat “daily operator duties” and “basic inspection at the beginning of the shift” as standard practice (wheels/locks, frame, restraints, function checks).
If you use powered cots, follow the manual’s training and operating guidance; manuals typically specify safe working load and minimum operators for loading/unloading. - Match stretcher position to the task (30–60 seconds)
Set a working height and approach angle that minimizes awkward lifts. Powered patient-handling equipment can reduce reported MSD injuries, but organizations still report trade-offs and remaining safety concerns—so staff appropriately and keep the spotter active. - Package and secure the patient (2–4 minutes)
Use your protocol—but borrow two high-value checks from WHO transfer tools: (a) the patient is secured to the stretcher and (b) the stretcher itself is secured before movement; WHO also highlights packaging that preserves access and minimizes pressure-area injury risk. - Move with clean commands (2–5 minutes)
Use short commands (“Ready—Up—Move—Stop—Down”) and keep the spotter controlling thresholds and slope transitions. - Loading/unloading + retention confirmation (1–2 minutes)
Treat this as a scored event. Litter integrity/retention and patient restraints have dedicated crash-test methodology in SAE-based practices summarized by CDC/NIOSH; translate that into one visible drill behavior: positive fastener lock confirmation + two-person verify. - Decon, restock, return-to-service (2–4 minutes)
WHO checklists include cleaning/restocking at the end of transfer workflows.
For noncritical equipment that touches intact skin, CDC recommends low-level disinfection and routine cleaning/disinfection, with prompt action when visibly contaminated.

Safety checks and common mistakes
Safety checks that prevent most drill “near-misses”
Use these as evaluator prompts:
- Before movement: wheel locks, restraint integrity, rails locked, planned hand positions (manufacturer inspection checklists commonly include these).
- Before load/unload: minimum operators present + spotter in position (some cot manuals specify minimum operators for occupied loading/unloading).
- Before return-to-service: disinfect + inspect + dry + restock; CDC and WHO both make “clean/restore readiness” a core expectation.
Common mistakes to build as drill injects
- Missing strap/buckle discovered mid-lane (staging failure).
- “Powered” interpreted as “one-person job” (staffing failure).
- Retention not verified after loading (safety failure).
- Packaging blocks monitoring access (clinical workflow failure).
- Decon skipped or rushed between patients (infection-control failure).
Scoring, evaluation, and after-action improvement
HSEEP describes exercises as a way to assess/validate capabilities and to document strengths, areas for improvement, and corrective actions that flow into an After-Action Report/Improvement Plan (AAR/IP).
FEMA’s Exercise Evaluation Guides (EEGs) are designed to streamline data collection, support AAR development, and map results to objectives and critical tasks.
Simple scorecard rubric
| Dimension | 0 = Fail | 2 = Meets | 4 = Exceeds |
|---|---|---|---|
| Equipment readiness | No ready check / defects missed | Ready check completed | Ready check + defects logged + corrections tracked |
| Role clarity & comms | Conflicting commands | Standard commands used | Commands are crisp; spotter anticipates hazards |
| Securement quality | Rework required | Securement per protocol | Securement + monitoring access preserved |
| Retention verification | Not verified | Verified once | Verified + two-person confirm habit |
| Reset to service | Not cleaned/restocked | Cleaned + restocked | Cleaned + inspected + return-to-service documented |
After the lane, close the loop with corrective actions that have an owner, a due date, and a “how we’ll validate next drill” line—HSEEP improvement planning is built for that cadence.
Procurement toolkit for standardizing rescue stretchers
Procurement risk control checklist
Use this to reduce operational risk and hidden cost:
- Compatibility: some manufacturer guidance warns that combining different manufacturers’ cots and fastening systems can increase risk of injury and damage—verify compatibility before you standardize.
- Capacity and staffing: capture safe working load and minimum operators (example specs in manufacturer manuals).
- Inspection and maintenance: require daily operator checks + a documented maintenance schedule.
- Cleanability: require written cleaning/disinfection guidance and align SOPs to CDC recommendations for noncritical equipment.
- Training: require onboarding and refresher drills; safe patient handling guidance treats training as part of prevention.
Procurement flow
- Define operational scenarios + vehicle interfaces.
- Run a sample through a 30-minute drill lane with the scorecard.
- Lock specs + service terms (spares, training, warranty, documentation).
- Roll out with training + a 90-day validation drill.
Copy-paste RFQ template
Subject: RFQ — Rescue Stretchers for EMS/Fire/Disaster Field Deployment & Drills
- Intended use: [EMS transport / technical rescue / disaster response / interfacility transfer]
- Stretcher type: [powered cot / manual cot / folding stretcher / basket litter]
- Qty: [ ] Destination: [ ]
- Required safe working load: [ ] kg / [ ] lb
- Vehicle interface (if ambulance cot): [deck height range / fastener model]
- Inspection + maintenance documents required: [manual + schedule]
- Cleaning/disinfection guidance required: [Yes/No]
- Training materials required: [PDF/video/checklist]
- Sample request: [Yes/No] Desired arrival date: [ ]
Sample request CTA
If you’re standardizing across teams, request a sample set and run the drill lane above before committing—evaluation turns procurement into a measurable decision.

Ready to Standardize Your Rescue Stretcher Deployment?
Take this into your next drill: run one lane, record time + errors, then repeat after one correction. That’s how you turn training into measurable readiness.
If you’re sourcing rescue stretchers for EMS, fire, or disaster teams, Jiekang supports OEM/ODM and sample evaluation. Request a sample or quote—send your target load capacity, preferred type (cot/folding/basket), and destination, and we’ll recommend options.

