

When a stretcher drill goes wrong, it usually isn’t because the team is lazy or unprepared. More often, the problem is inconsistency. One crew checks the straps, assigns roles, and clears the route before moving. Another crew starts rolling before anyone confirms who is leading, who is spotting, or whether the patient is secured.
That kind of variation matters. It creates hesitation at doorways, confusion during transfers, and avoidable mistakes at the ambulance. Instead of testing readiness, the drill ends up measuring chaos.
The good news is that stretcher handling in emergency drills can be standardized. With a clear script, defined roles, and a simple evaluation method, you can turn patient movement into a repeatable training lane that crews can run, score, and improve over time.
This guide walks through safe lifts, transfers, stair and threshold movement, ambulance loading, common failure points, and a simple drill scorecard. It is written for EMS trainers, fire-rescue teams, and equipment buyers who want drills to be safer, more realistic, and easier to evaluate.
Always follow local protocols and the manufacturer’s instructions for use (IFU) for every stretcher, cot, fastener, or loading system used in training.

Why stretcher drills often break down
Most stretcher mistakes in drills are not dramatic. They are small breakdowns that stack up quickly.
A strap is missing. Two people give commands at the same time. The team reaches a doorway too fast. The spotter assumes someone else is watching the wheel clearance. A powered cot is treated like a one-person device. None of these errors seem major at first, but together they create exactly the kind of unsafe handling that drills are supposed to prevent.
That is why consistency matters more than intensity. A strong team without a repeatable process will still struggle. A well-trained team with simple routines will usually move more safely and more smoothly.
In practice, the best stretcher drills are built around three ideas:
- one set of roles
- one sequence of commands
- one standard for securement, movement, loading, and reset
Once those are fixed, performance becomes easier to measure and easier to improve.
Start with simple, realistic team roles
You do not need a large command structure to run a good patient-movement lane. You only need clear ownership.
Here is a practical role setup for most drills:
Team Lead
The Team Lead controls the pace of the move and gives the commands. This person should be the only one calling “Ready,” “Move,” or “Stop.” One voice reduces hesitation and mixed signals.
Head-End Operator
This operator controls the steering end and helps maintain alignment through doors, corners, and transitions. In many scenarios, this person has the best view of patient positioning and route direction.
Foot-End Operator
The foot-end operator focuses on stability, wheel control, leg position, and balance. This role is especially important during loading, unloading, and movement across uneven surfaces.
Spotter / Route Owner
The spotter owns the environment. That includes thresholds, stairs, blind corners, curbs, and the ambulance deck edge. If there is a hazard on the route, the spotter calls it early.
Safety / Recorder
This person watches the lane, logs errors, tracks time, and has the authority to stop the drill if something becomes unsafe.
When these roles are assigned before movement starts, drills feel calmer and cleaner. Teams stop improvising and start moving with purpose.

Use a short command script every time
The fastest way to reduce confusion is to teach the same handling script in every drill.
Long explanations do not help in motion. Short, repeated commands do.
A good basic command sequence looks like this:
- Ready
- Move
- Slow
- Stop
- Clear
- Re-check
These words are simple, but they create rhythm. Everyone knows when movement starts, when it pauses, and when attention needs to shift to the patient, the equipment, or the route.
The real goal is not just efficiency. It is predictability. The more predictable the drill feels, the easier it is to spot errors and coach corrections.
Stage the lane before the clock starts
A lot of drill time gets wasted before the team even touches the stretcher. People search for straps, wipes, PPE, or missing accessories. That kind of delay does not build skill. It just creates noise.
A better approach is to stage the lane the same way every time.
Before the run begins, make sure:
- the stretcher or cot is in the start position
- straps are present, open, and ready
- PPE and wipes are accessible
- the route is identified
- the ambulance or loading point is ready
- the evaluator has the scorecard and timer
This only takes a minute, but it removes preventable friction. It also makes the drill more realistic, because real patient movement depends on equipment readiness, not just operator effort.
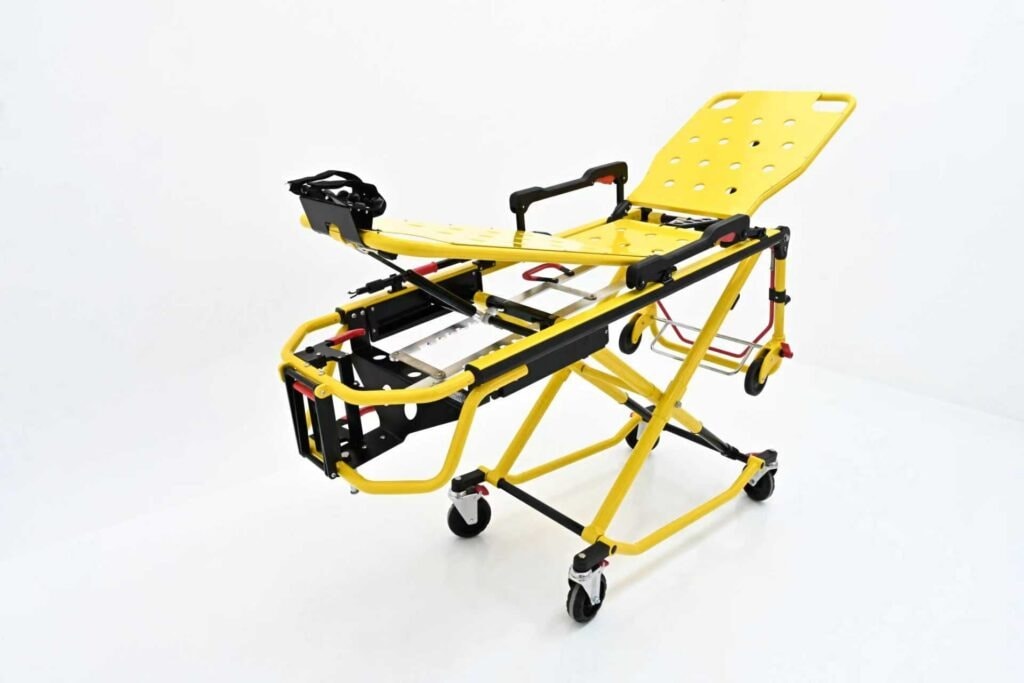
Pre-check the stretcher before movement
Before any lift or transfer, the team should pause for a quick equipment check.
This step should include:
- visible condition of the stretcher or cot
- strap presence and condition
- locking points or fasteners as applicable
- wheel position and readiness
- weight and load awareness
- enough trained operators for the device in use
This part is especially important with powered cots. Powered equipment can reduce physical strain, but it does not remove staffing requirements, safe working load limits, or the need for coordination. One of the most common training mistakes is assuming “powered” means “one person can manage it.” That mindset causes shortcuts.
A quick pre-check makes the rest of the lane smoother and safer.
Secure the patient before you move
If the patient is not secure, the move should not start. It is that simple.
In many drills, teams rush this part because they are eager to get moving. But securement is not a small detail. It is one of the core handling skills the drill should measure.
A reliable routine looks like this:
1. Center the patient
Make sure the patient is positioned correctly on the surface before straps are applied.
2. Apply straps in a consistent order
Use the same sequence every time according to your protocol and device setup.
3. Confirm fit and tension
Straps should be buckled and snug, not twisted, loose, or half-checked.
4. Re-check before movement
Do one quick visual and hands-on confirmation before the team starts rolling.
5. Re-check again after obstacles or transitions
Turns, thresholds, and loading can shift both patient position and strap tension.
Teams that build in these small pauses usually perform better overall. They make fewer mistakes later because they stop rushing early.
Handle thresholds and turns with intention
Doorways and corners are where smooth movement often falls apart.
A team that looks solid in open space can suddenly lose alignment at a doorway. Wheels drift. The frame clips the edge. Someone switches grip to one hand. The patient feels the wobble immediately.
That is why thresholds should be treated as a skill, not as a minor detail.
Here are a few habits that help:
- slow down before the threshold, not after
- let the spotter own clearance calls
- keep both hands on stable control points
- avoid fast pivots in tight spaces
- communicate wheel and frame position clearly
Simple phrases such as “wheel clear,” “leg clear,” or “slow left” are easy to teach and easy to repeat in every run.
The point is not to make movement look dramatic. The point is to make it look controlled.
Use the right device for stairs
Stairs should never become an improvisation test.
If the scenario includes stair movement, use the equipment designed for it, such as a stair chair or other stair-capable transport device that matches your local protocol and training standards. A standard ambulance cot should not be casually treated as a stair tool just because the team is in a hurry or wants to “make it work.”
In stair drills, focus on:
- stable positioning before movement starts
- slow, deliberate commands
- clear lead and follow roles
- spotter awareness throughout ascent or descent
- controlled pace rather than speed
Many teams lose points here because they rush. But a slower, stable stair move is a better outcome than a fast, messy one.
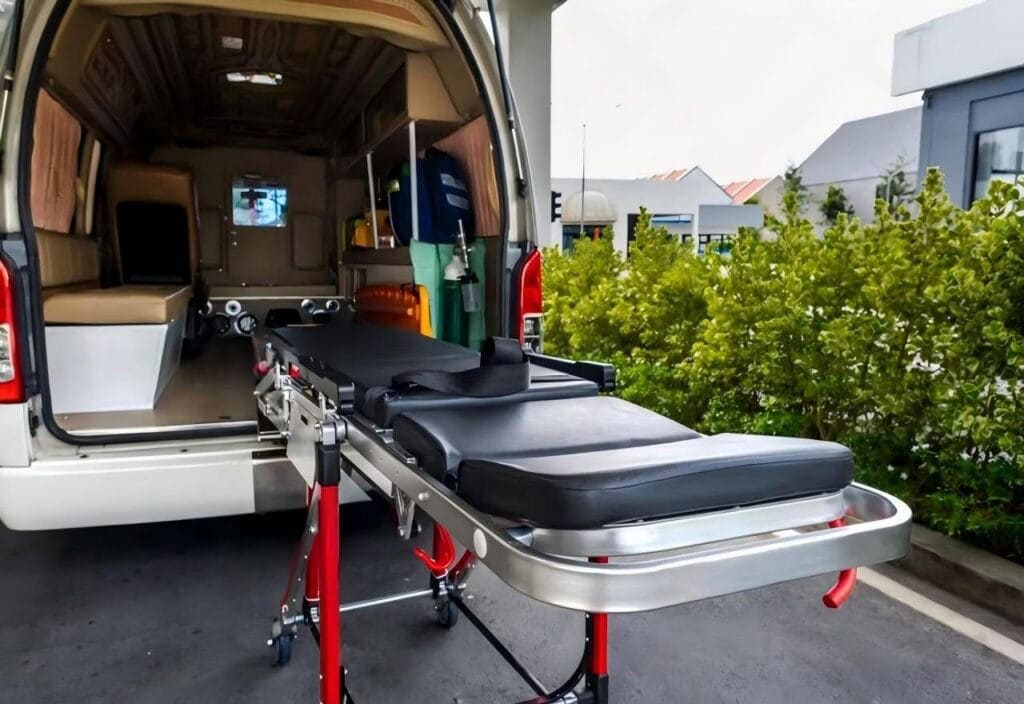
Make ambulance loading a scored event
Loading and unloading are often treated like the last small step in the drill. In reality, they should be one of the most closely watched parts.
This is where teams tend to relax too soon. They assume the hard part is over, then skip verification of retention, locking, or team coordination.
Instead, make loading a formal checkpoint.
A good loading routine should include:
| Step | What to verify |
|---|---|
| Approach | Team is aligned and moving under one leader |
| Position | Cot is correctly lined up with the loading point |
| Load | Operators follow device procedure without rushing |
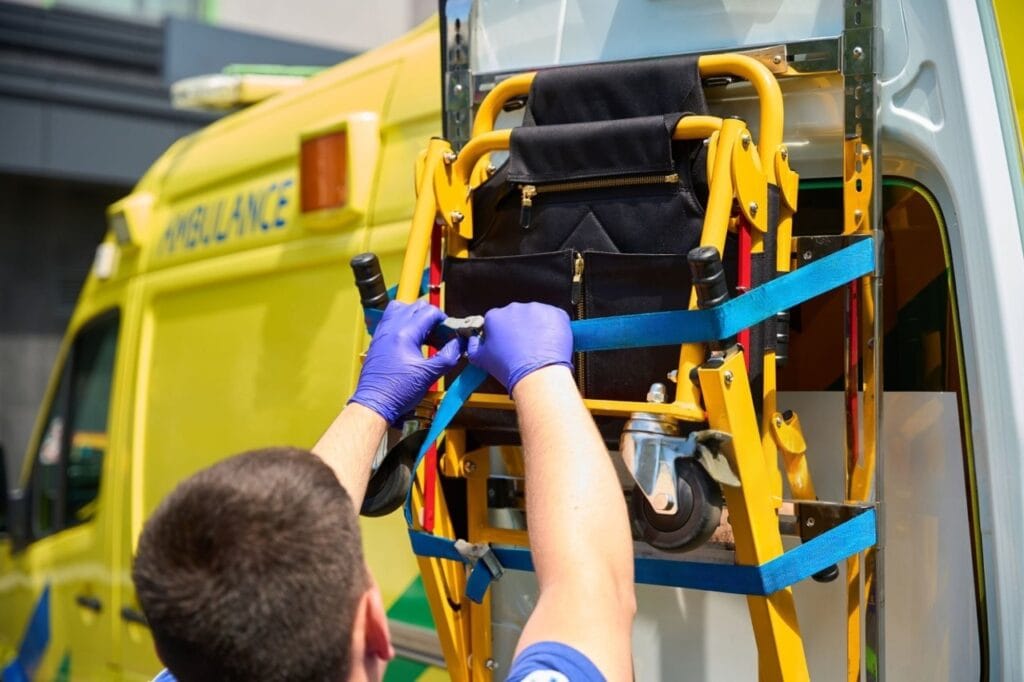
| Retention check | Locking/fastener system is engaged and confirmed |
| Two-person verification | A second person confirms the retention status |
| Unload | Same level of control is maintained in reverse |
That two-person confirmation is especially valuable. It turns loading from assumption into verification.
And yes, add the same safety note here again in training materials: always follow local protocols and the stretcher or loading system IFU.
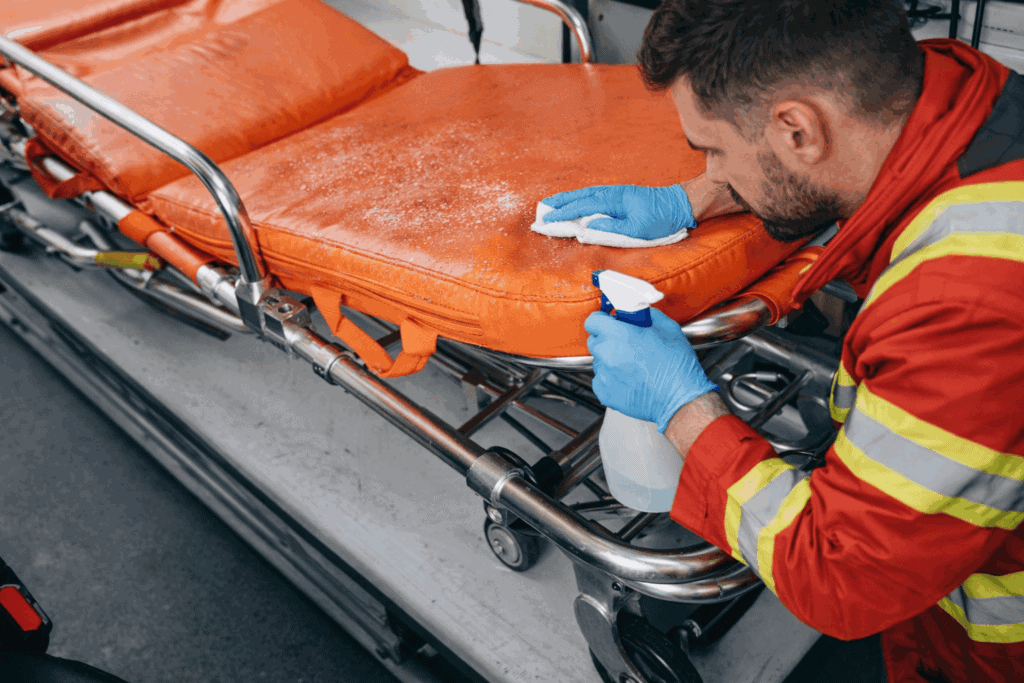
Do not skip decontamination and reset
A stretcher lane is not finished when the patient reaches the ambulance. It is finished when the equipment is ready for the next patient.
Reset is where many drills quietly fail. The team completes the visible movement portion, but the stretcher is left dirty, straps are twisted, wipes are missing, and nothing is truly ready for the next run.
That creates two problems. First, it trains bad habits. Second, it hides readiness issues that matter in the real world.
Your reset phase should include:
- cleaning or decontamination as required
- inspection of straps and contact surfaces
- replacement of used supplies
- battery or power check if applicable
- return to a ready state for the next scenario
A drill should end with readiness restored, not just movement completed.
Common stretcher handling mistakes to build into training
If you want drills to improve real-world performance, do not only practice perfect runs. Also practice common mistakes on purpose so crews learn to spot and correct them.
The most useful training injects include:
Unstaged straps
Buckles are tangled, a strap is missing, or the crew notices securement too late.
Mixed commands
Two people call the move at the same time, causing hesitation or uneven lifting.
Doorway drift
No one truly owns the threshold, and the stretcher clips the frame or stalls in the opening.
Improvised stair movement
The team tries to force a standard cot into a stair scenario without the right device or method.
No re-check after transition
The patient was secured at the start, but no one checks straps after a turn, bump, or load.
“Powered equals one-person” thinking
A powered cot is treated like it removes the need for teamwork, staffing, or caution.
Reset skipped
The team leaves the lane dirty, incomplete, or not ready for the next run.
These mistakes are valuable because they are common, realistic, and highly teachable.
Timing targets for a practical drill lane
A stretcher drill does not need to be long to be useful. Good drill timing still depends on proper lifting and moving technique.
Here is a simple benchmark table you can adapt:
| Segment | Target Time | What good performance looks like |
|---|---|---|
| Staging + pre-check | 3–4 min | Equipment ready, straps staged, roles assigned |
| Securement | 2–3 min | Patient centered, straps applied, quick re-check completed |
| Thresholds + turns | 2–4 min | Controlled route movement, no strikes or stalls |
| Stairs/obstacles | 4–6 min | Right device used, pace controlled, spotter active |
| Load/unload | 1–2 min | Alignment maintained, retention verified, two-person confirm |
| Reset to ready | 2–4 min | Equipment cleaned, restocked, and ready for reuse |
These are not universal standards. They are starting points. The real value comes from using the same timing structure repeatedly so you can compare one crew, one shift, or one quarter against another.
Score the lane so training leads to improvement
A drill without evaluation is just activity.
If you want the blog to support operational change, you need a simple way to score performance and track what gets better over time.
One easy method is a 0–2–4 rubric.
Roles and commands
- 0 = mixed commands, no clear leader, poor coordination
- 2 = leader assigned, commands mostly consistent
- 4 = crisp command flow, hazards called early, smooth teamwork
Securement quality
- 0 = straps loose, missing, or unchecked
- 2 = patient secured, re-check completed
- 4 = securement is consistent, timely, and re-checked after transitions
Route control
- 0 = threshold strikes, stalls, drift, unclear spotting
- 2 = route handled safely with minor corrections
- 4 = hazards anticipated early, movement smooth and controlled
Loading and retention verification
- 0 = retention not verified
- 2 = retention checked once
- 4 = retention confirmed every run with two-person verification
Reset readiness
- 0 = dirty or incomplete reset
- 2 = equipment cleaned and restocked
- 4 = equipment cleaned, inspected, documented, and ready
This style of scorecard is quick enough to use in routine training and structured enough to support an improvement plan.
What to do after the score is recorded
The score itself is not the goal. The goal is the follow-up.
After each run, identify:
- one priority correction
- one owner
- one due date
- one method to validate improvement in the next drill
That keeps the exercise from turning into “good job, try harder next time.” Instead, it creates a real improvement loop.
For example, if a team repeatedly struggles at thresholds, the action item might be:
Owner: Shift training lead
Correction: Standardize doorway spotter language
Due date: Before next monthly drill
Validation: Re-score threshold movement in next lane
Simple, specific corrections work better than broad feedback.
Procurement matters more than many teams think
For training centers, distributors, and operations leaders, stretcher performance is not only about field technique. It is also about equipment selection.
A stretcher that is hard to clean, difficult to standardize, or poorly matched to the vehicle and training environment will create handling problems no matter how motivated the team is.
When reviewing equipment, focus on more than the sales sheet. Ask practical questions:
- Are the IFUs easy for instructors and operators to access?
- Is the safe working load clearly defined?
- Are minimum operator requirements stated clearly?
- Is the cot compatible with the vehicle retention system?
- Are straps, pads, and other soft goods easy to replace?
- Can the surfaces handle your cleaning workflow?
- Are there training materials to support standardization?
- Does the device actually fit your scenarios, including stairs or narrow spaces?
The best stretcher for drills is not necessarily the one with the flashiest feature set. It is the one that supports repeatable, safe handling across teams.

A simple 4-step procurement flow
If you are comparing stretcher options for drills or field operations, this process works well:
1. Define the real scenarios
Think about stairs, corridor width, patient mix, bariatric needs, vehicle height, and decontamination demands.
2. Request samples
Do not rely only on brochures. Run a scored drill lane with actual users.
3. Lock in the support details
Confirm spares, manuals, training assets, warranty, and lead times.
4. Validate after rollout
Use train-the-trainer sessions and quarterly scored drills to confirm the equipment supports the process you want.
This approach reduces the chance of buying something that looks good on paper but performs poorly in practice.
Final thoughts on stretcher handling in emergency drills
The biggest stretcher-handling problems in drills are usually not dramatic equipment failures. They are routine failures of process: unclear roles, rushed movement, weak securement, poor route control, and skipped reset steps.
That is why the answer is not just “train harder.” The answer is to make the work more repeatable.
When crews use the same roles, the same movement script, the same safety checks, and the same scorecard, drills become easier to run and easier to improve. More importantly, they start measuring what matters: safe, consistent patient movement under realistic conditions.
If you want better outcomes from stretcher handling in emergency drills, start small. Standardize one lane. Score every run. Fix one problem at a time. Over a few cycles, those small improvements turn into safer lifts, smoother transfers, and fewer avoidable mistakes.
From Safer Drill Lanes to Better Equipment Decisions
Standardized drill lanes work better when the equipment also supports standardization. That means safe handling, easy cleaning, repeatable reset, and reliable compatibility across teams.
At jiekang, we supply spine boards, rescue stretchers, and related emergency products for training organizations, rescue teams, distributors, and government buyers, with sample evaluation, OEM/ODM options, training support, and product documentation.
If you’re reviewing equipment for drills or field deployment, send us your required configuration, target load capacity, and application scenario. We’ll help you compare suitable options before you scale.

